
A Guide To Good Preparation.
Preparation needs to be carried out correctly to achieve the best finish for your screed.
Poor preparation will
compromise the quality of your screed.
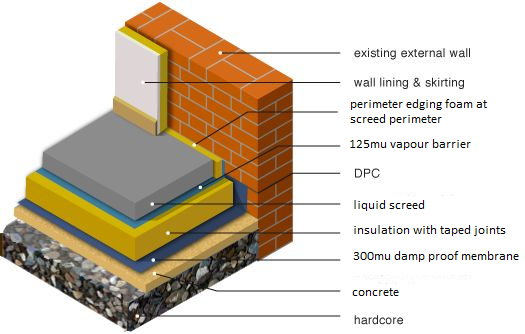
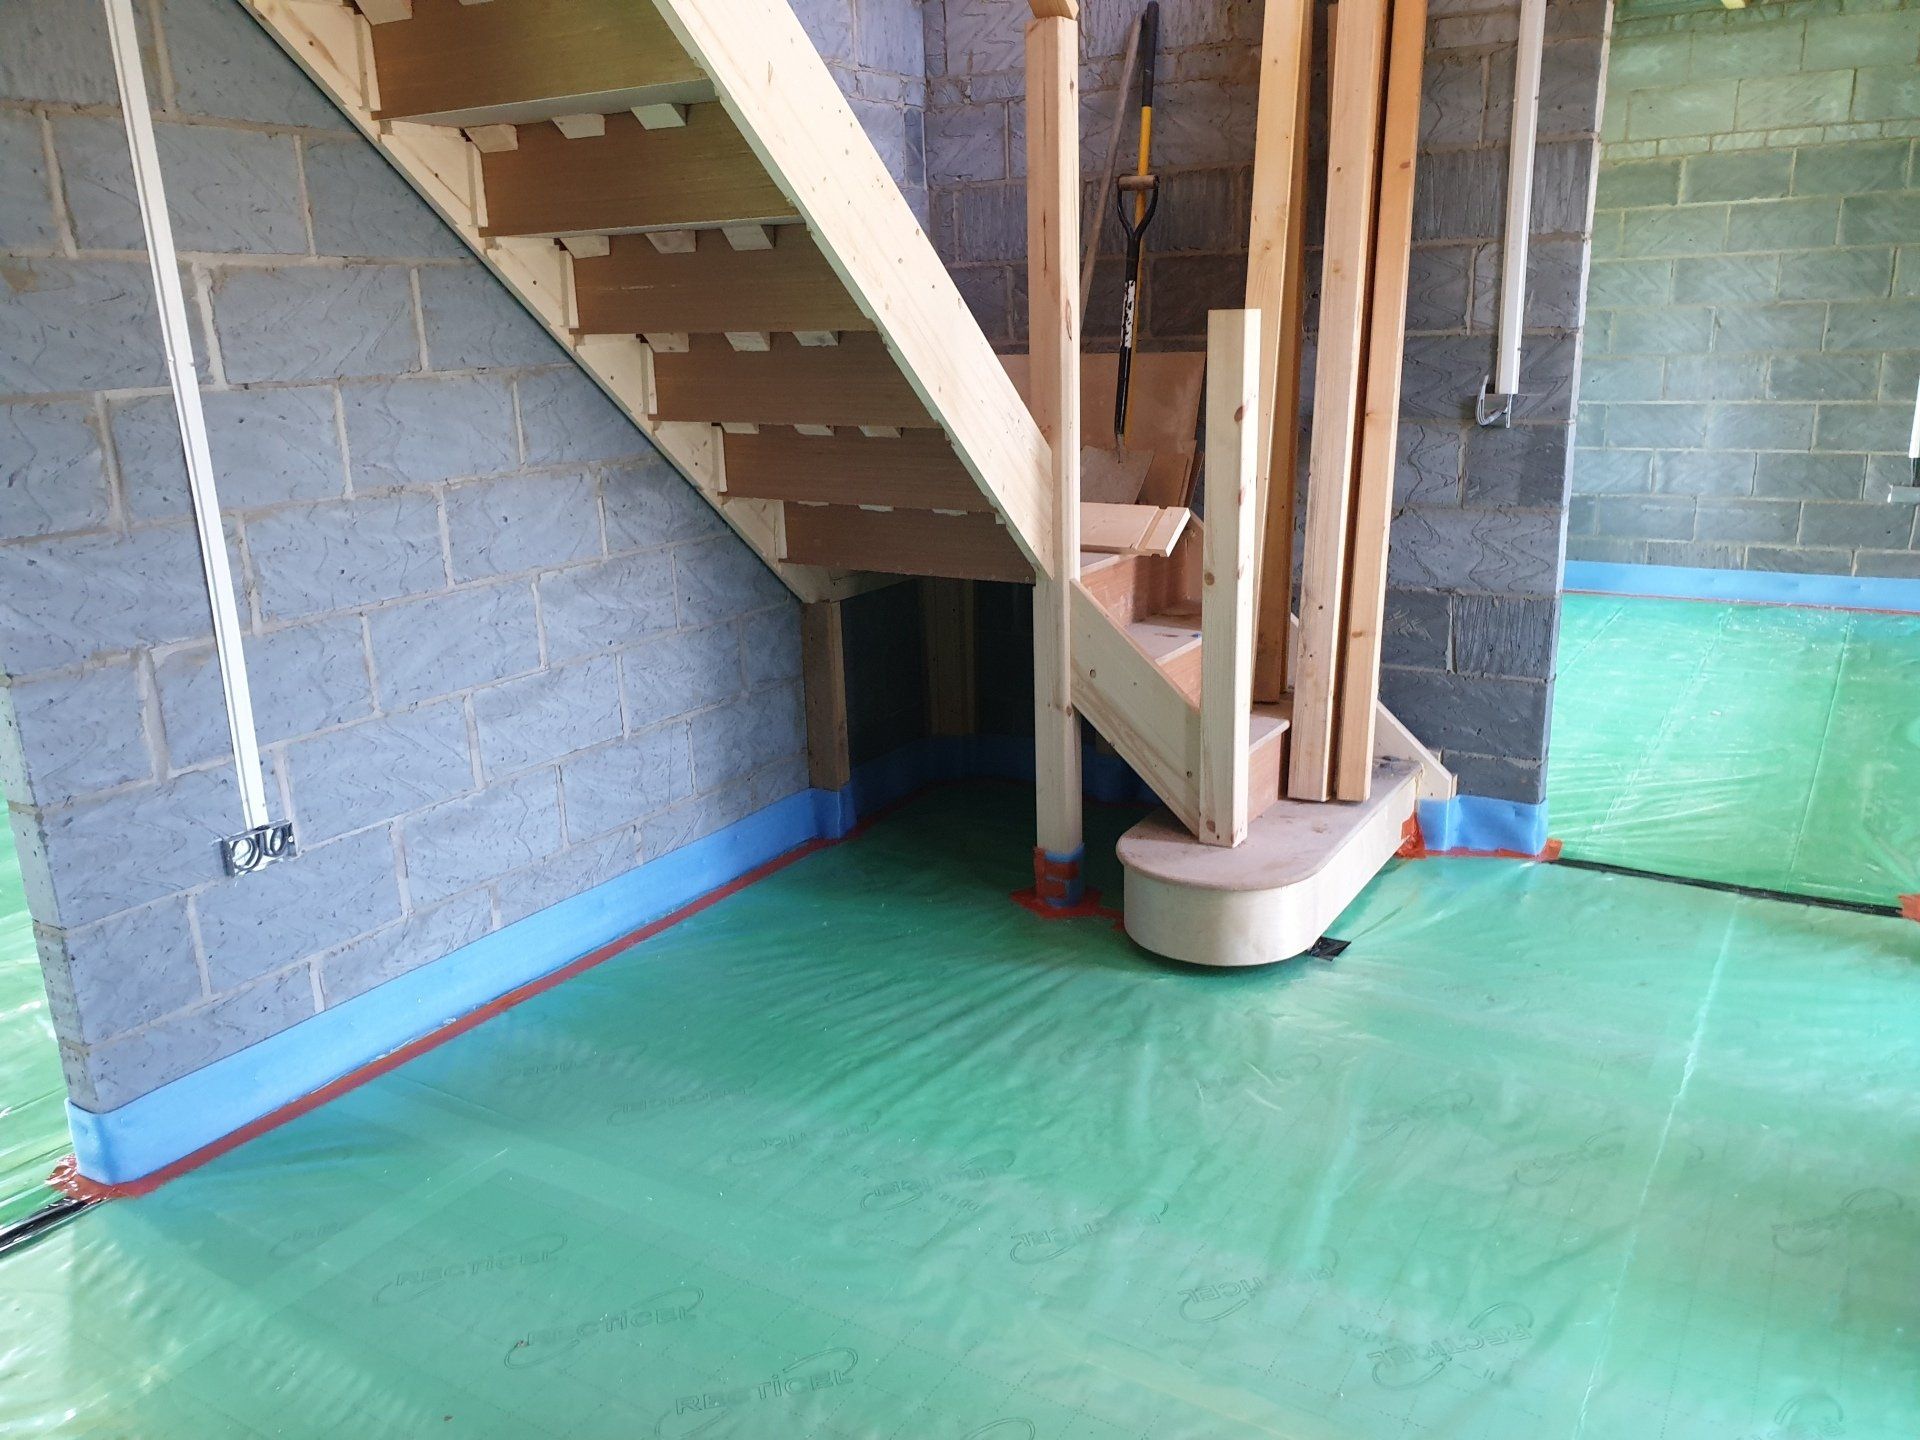
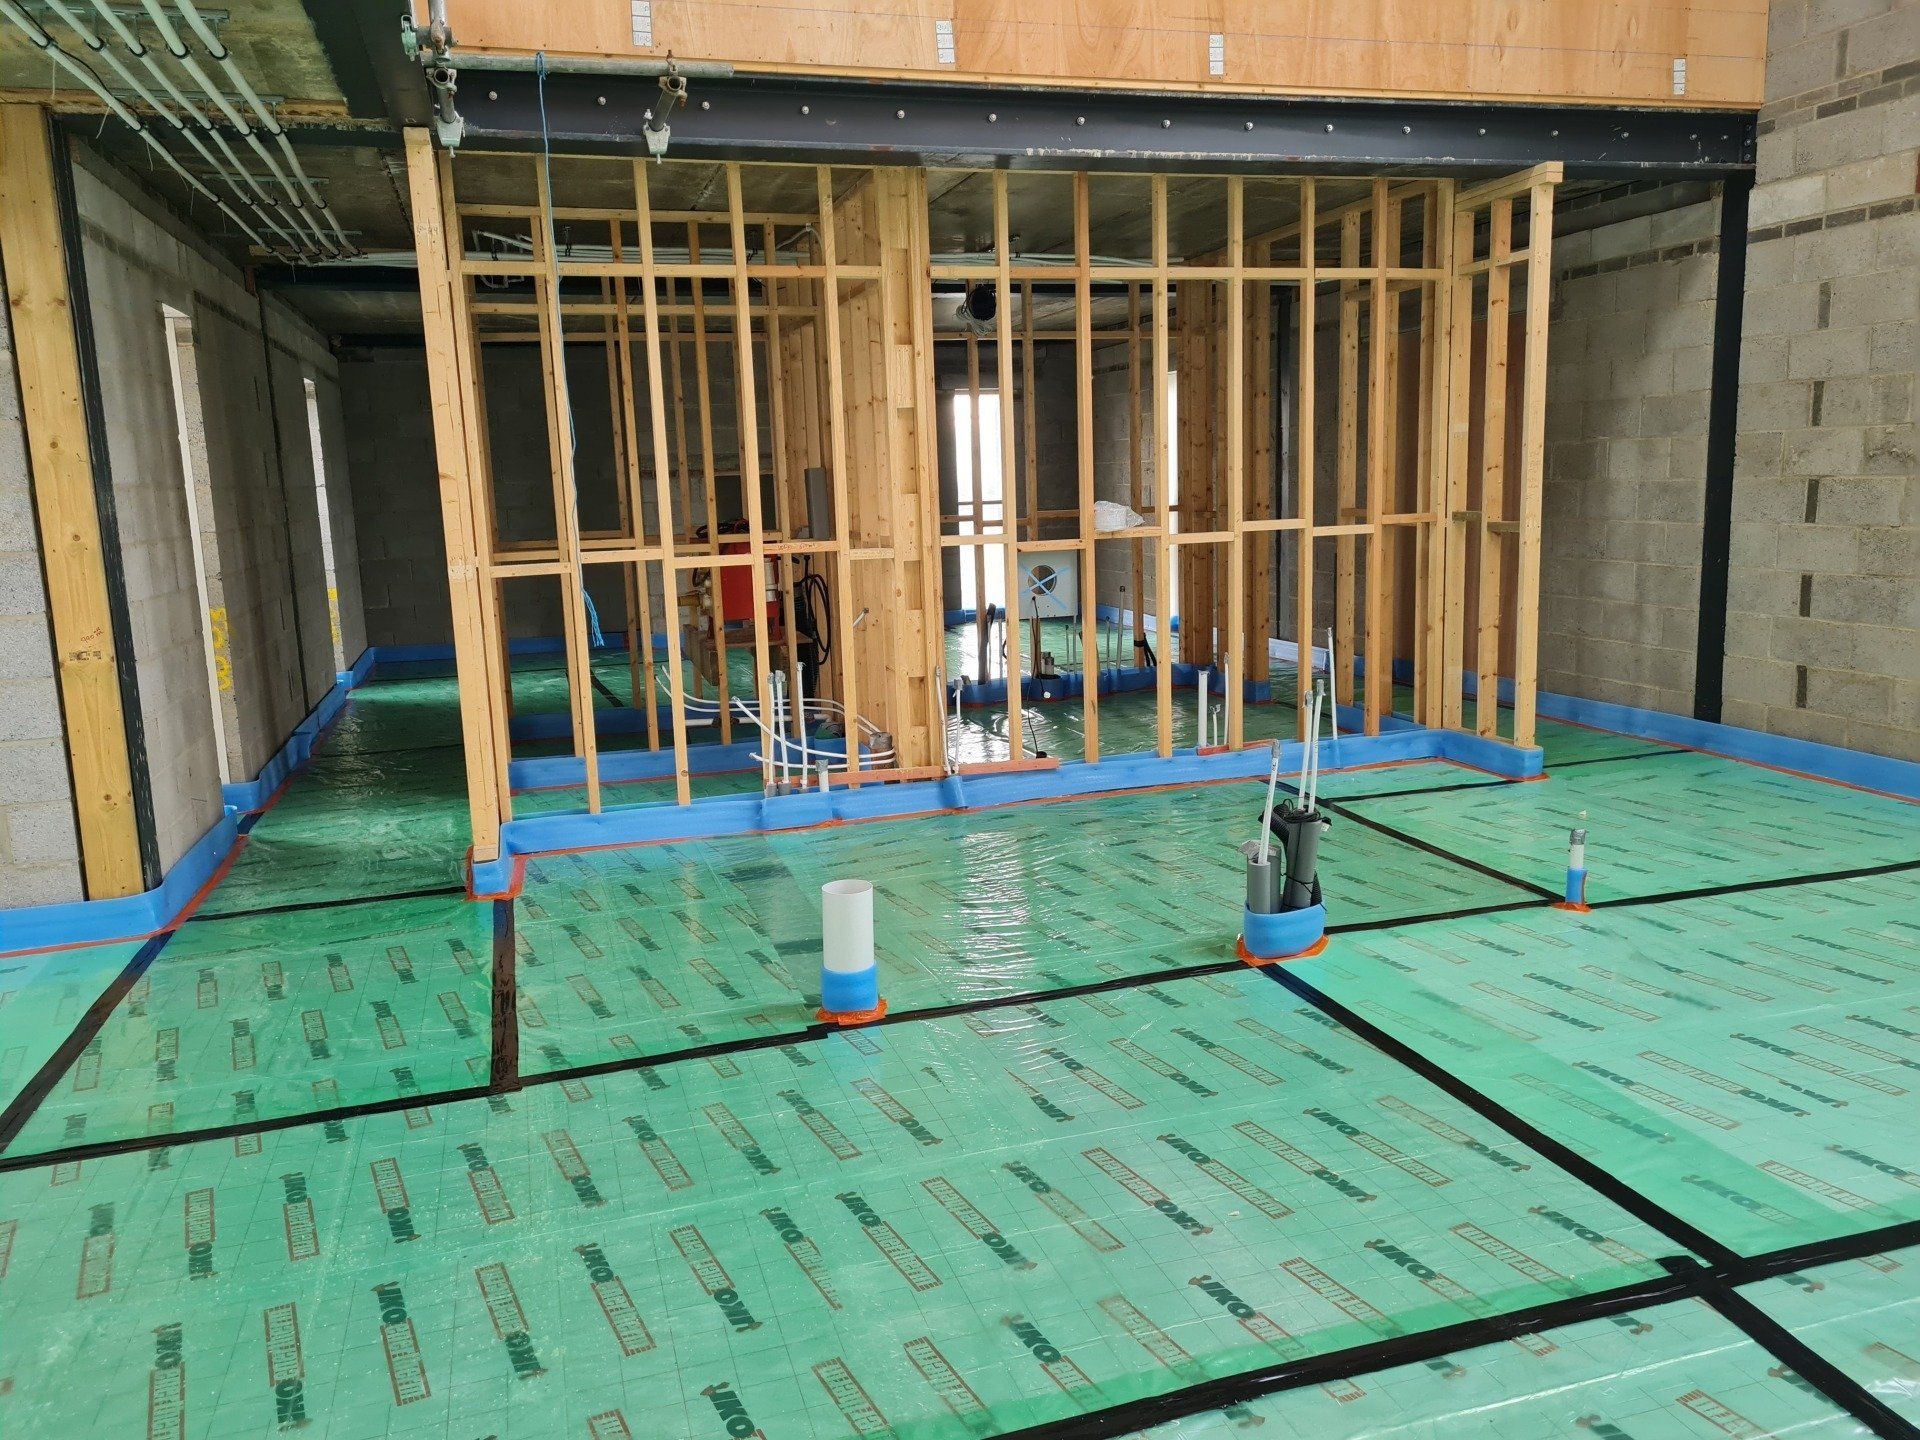
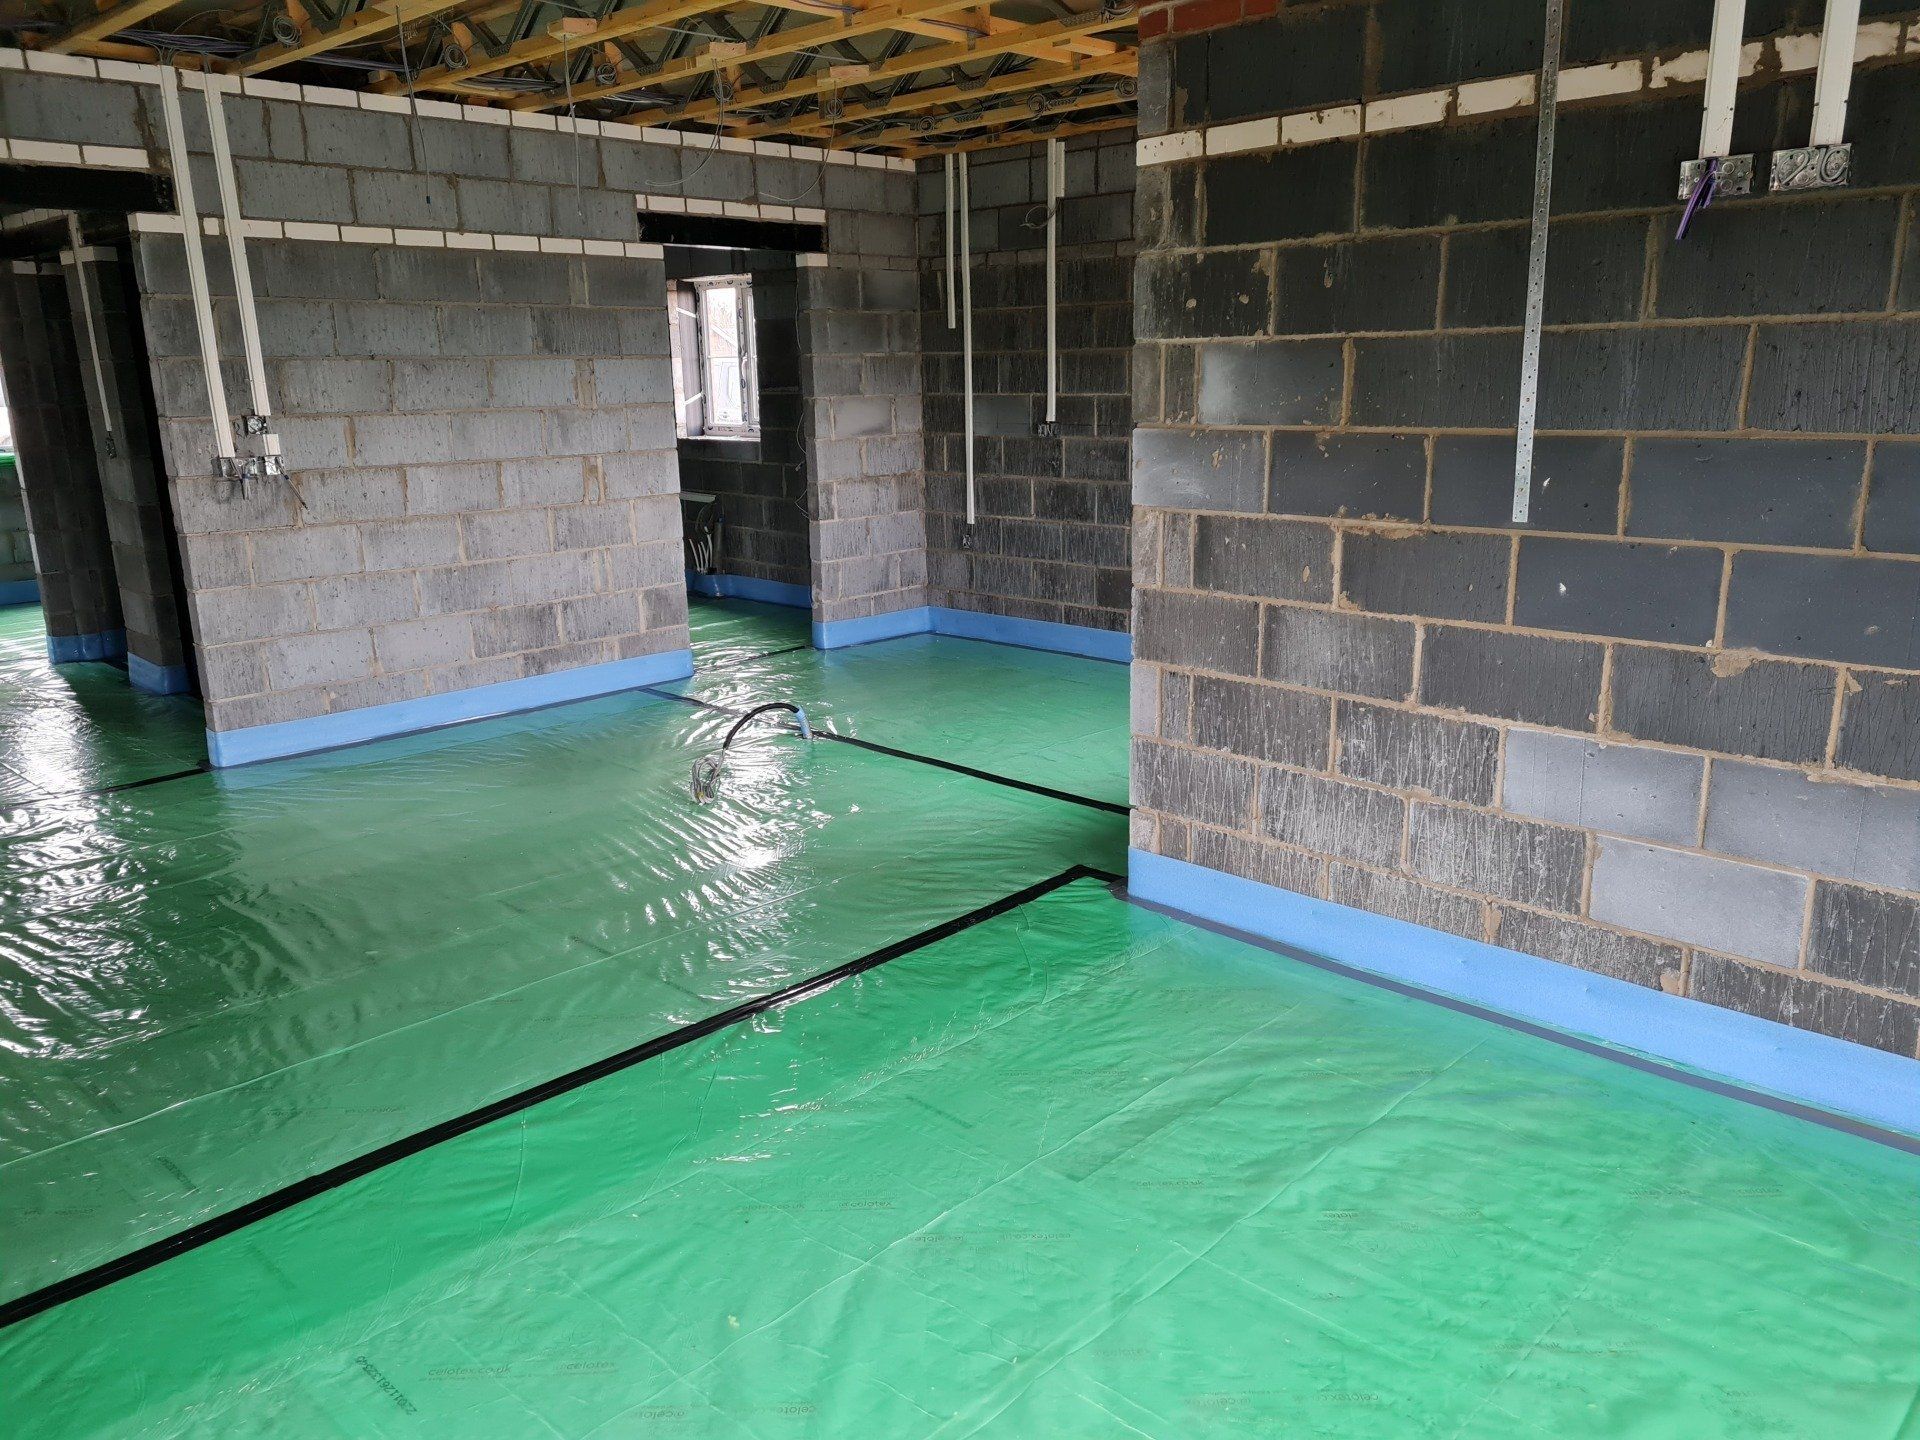
1. Scrape & sweep the oversite.
2. Lay a 1200 gauge / 300mu DPM.
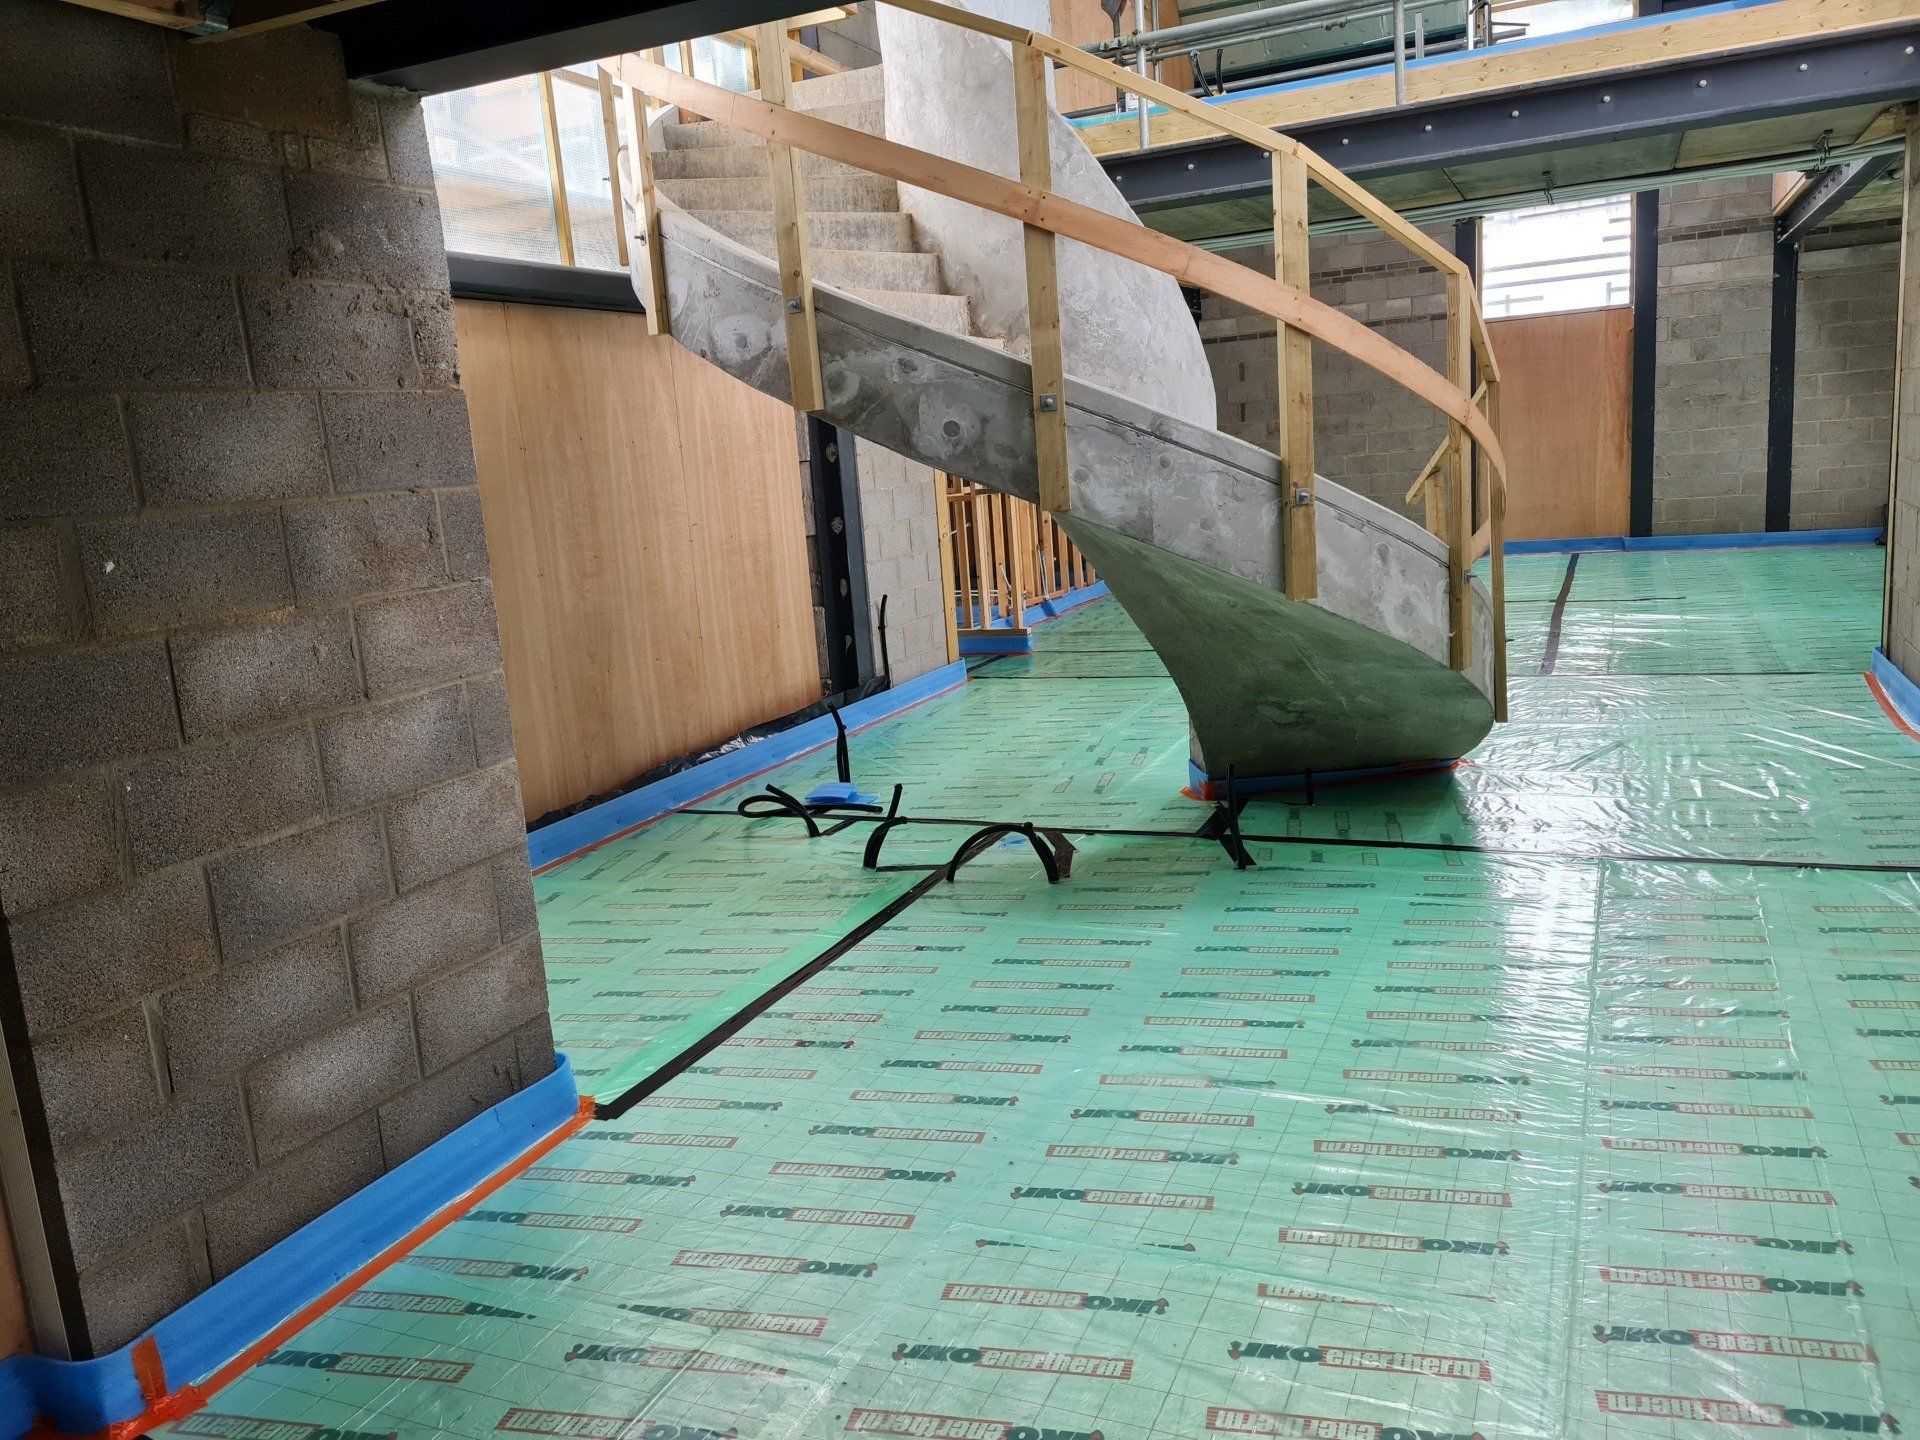
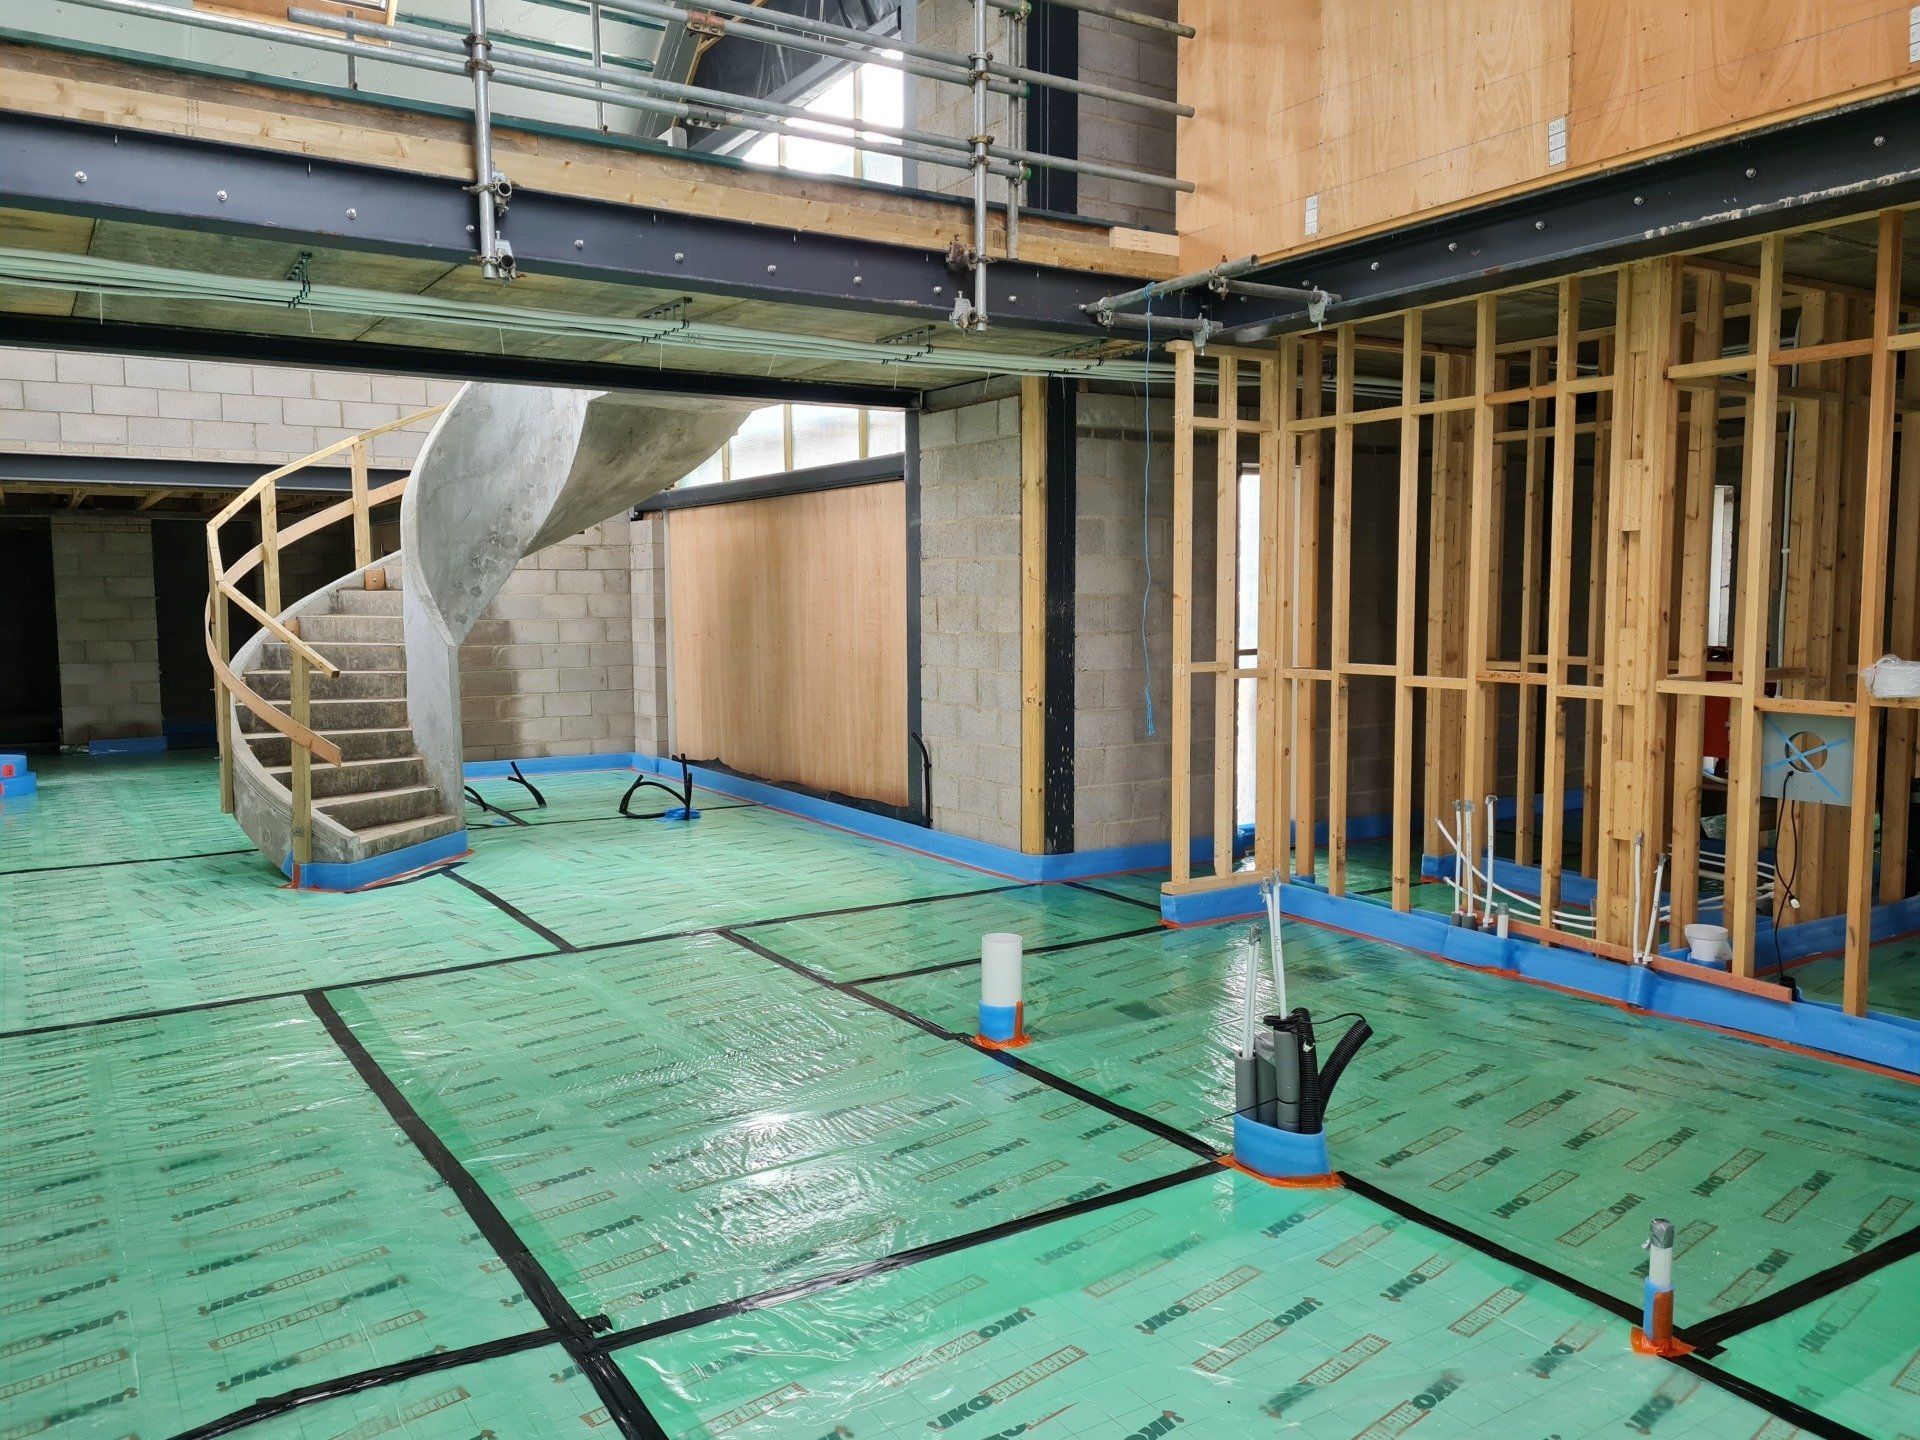
3. Fix 25mm Pir insulation to all external walls.
4. Lay floor insulation with no gaps and tape all joints using foil tape.
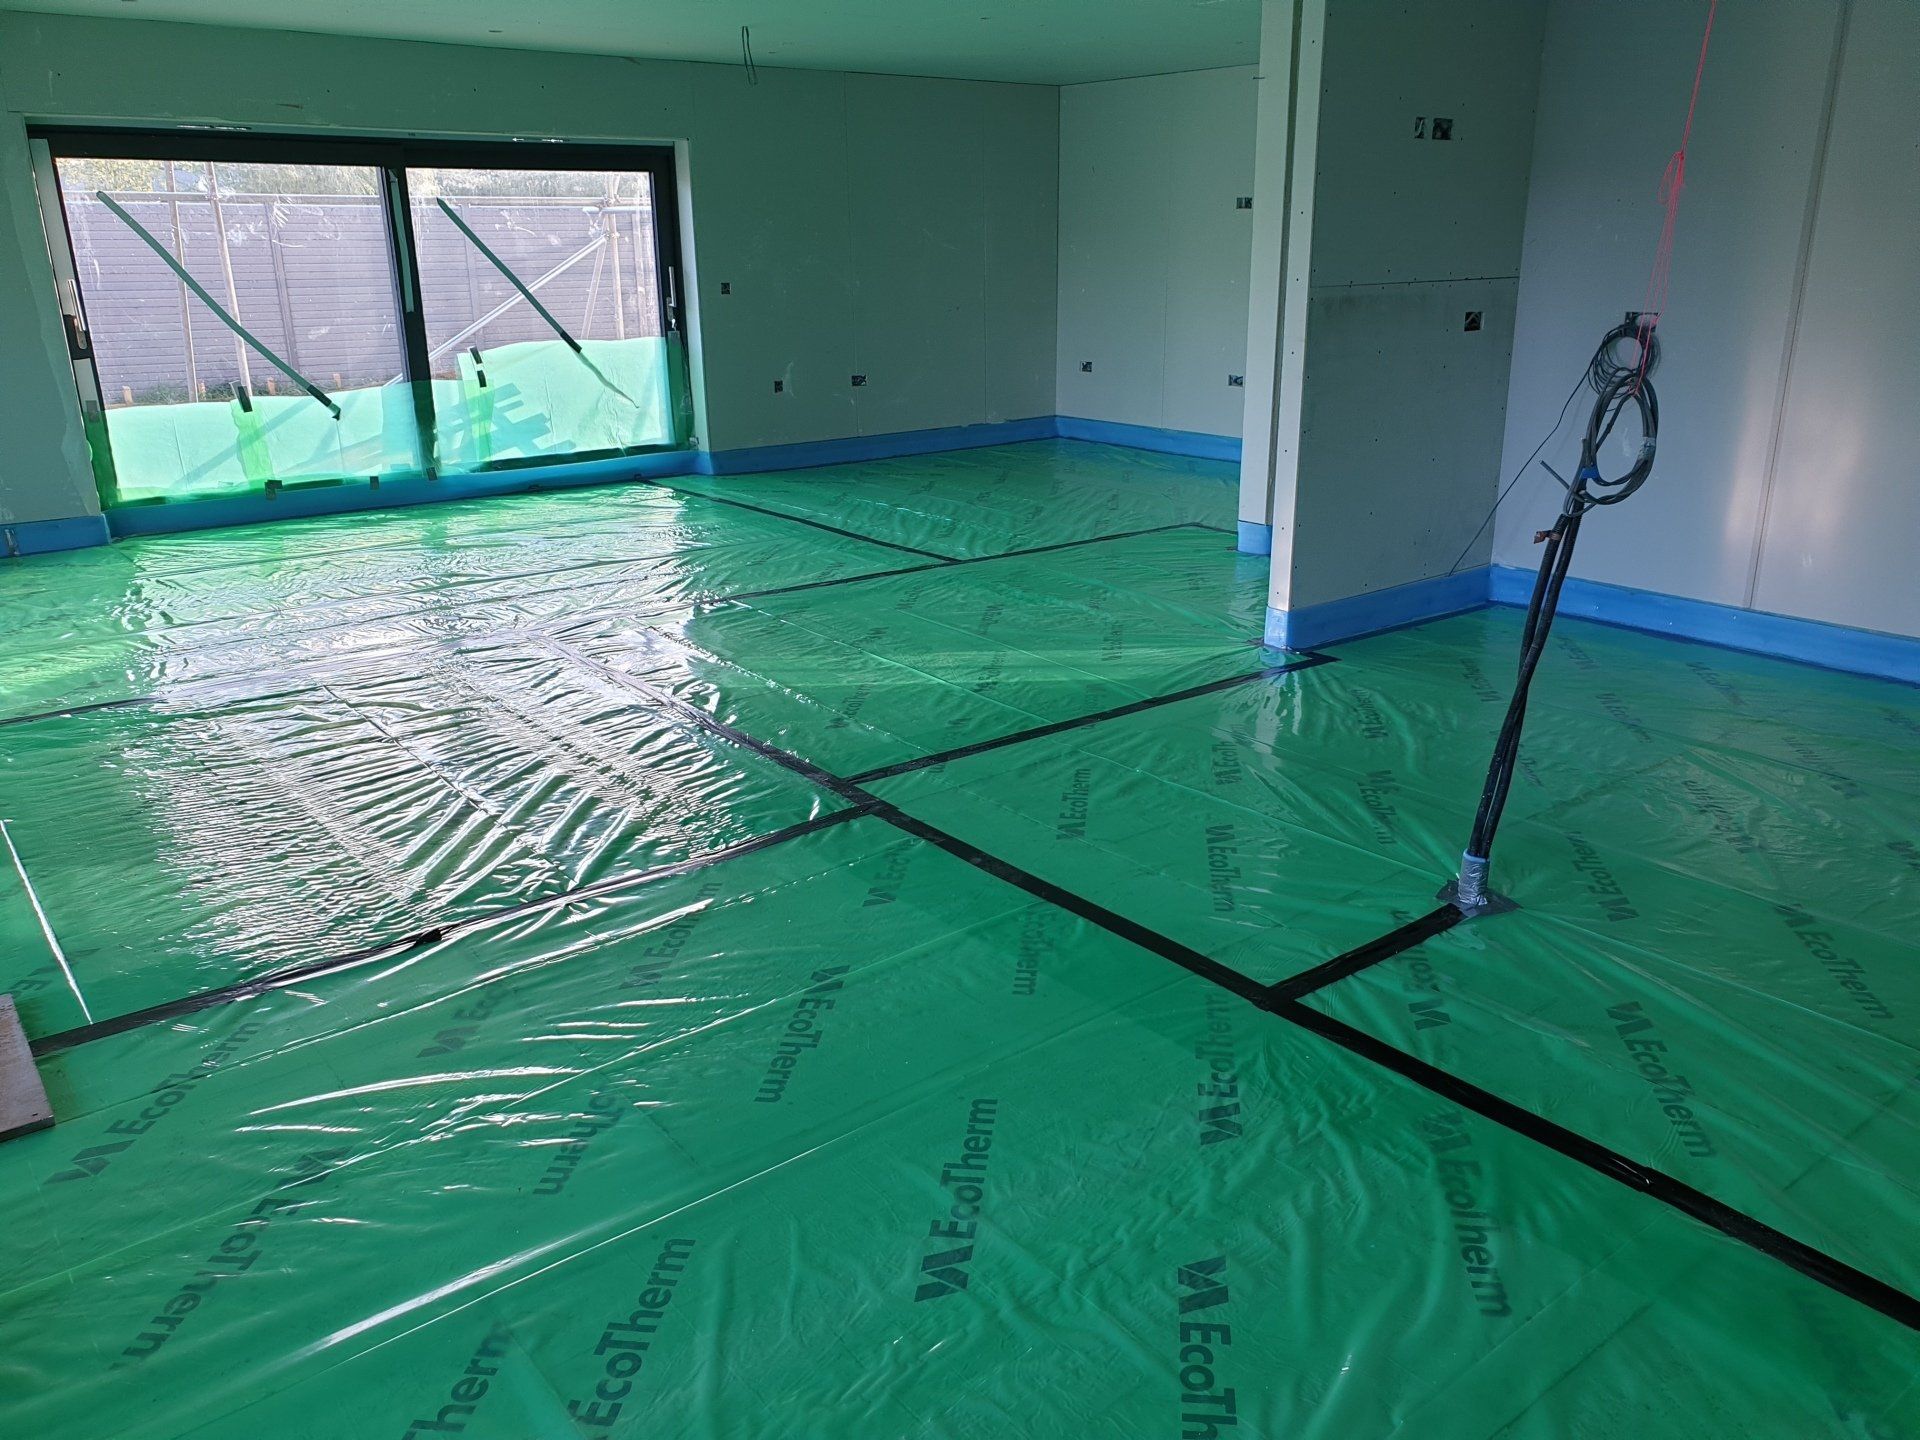
5. Neatly lay a 500 gauge / 125mu vapour barrier and tape all joints with a suitable polythene tape. (Overlap joints by 300mm)
6. Fix an 8-10mm perimeter edging foam with a polythene skirt to all walls, upstands, columns, piers and vertical pipes.
7. Tape the polythene skirt of the edging foam to the vapour barrier.
8. Lay & clip the underfloor heating pipes. (If required)
9. Check the entire floor for any holes, gaps or lifted tape where the screed could potentially escape and make the necessary repairs.
We can take care of all your preparation if required, on a labour only basis or we can supply the materials & labour. Please ask for details.


Some of the benefits of liquid screeds
1. Reduced screed depth compared to a traditional hand floated sand & cement screed.
2. No voids around the underfloor heating pipes, creating a stronger screed and more efficient heating.
3. No damage to underfloor heating pipes which is often caused by the use of wheel barrows.
4. Excellent heat transfer compared to traditional screeds.
5. Minimal shrinkage.
6. Low surface laitance (Dust) after curing.
7. Less labour intensive installs.
8. All our liquid screeds are lasered to achieve a surface regularity of at least SR2.